Grilled Chicken Wings: Achieve Crispy Skin & Juicy Meat with Two-Zone Grilling
There’s an undeniable magic to a plate piled high with perfectly grilled chicken wings. Whether it's the roar of a game-day crowd, the casual camaraderie of a backyard barbecue, or a relaxing afternoon by the pool, these savory bites are universally loved. But what transforms good wings into truly unforgettable ones? It's the elusive combination of ultra-crispy skin that crackles with every bite, paired with succulent, fall-off-the-bone juicy meat, all infused with that irresistible smoky char. Forget dry, rubbery wings or soggy skin – achieving grilling perfection is not just possible, it's easily repeatable with the right technique. The secret lies in a smart two-zone grilling method, combined with a few simple, yet powerful, preparation steps that elevate your wings from good to legendary.The Art of Preparation: From Raw Wings to Flavorful Foundation
Before your wings even touch the grill, their destiny for crispiness and juiciness is largely determined by how you prepare them. This stage is crucial for building flavor and ensuring optimal texture.Selecting and Prepping Your Wings
Often, your grocery store might offer whole chicken wings, which are typically more cost-effective than pre-cut flats and drumettes. Don't shy away from them! Cutting them yourself is remarkably easy:
- Lay a whole wing skin-side down on a sturdy cutting board.
- Locate the two distinct joints: one between the drumette and the flat, and another between the flat and the smaller, boney wing tip.
- Using a sharp chef's knife or robust kitchen shears, cut through each joint. Aim for the soft cartilage between the bones rather than trying to saw through bone itself.
- The drumette (the meaty, mini-drumstick part) and the flat (the middle section with two parallel bones) are your prime grilling candidates.
- The wing tips can be discarded or, better yet, saved in a freezer bag to add depth to homemade chicken stock later.
Once cut, the single most important step for crispy skin is to pat the wings thoroughly dry with paper towels. Excess moisture on the skin is the enemy of crispiness, as it creates steam rather than allowing the skin to render and brown.
The Secret to Crispy Skin: Beyond Just Seasoning
While a fantastic homemade barbecue rub is non-negotiable for bold flavor (and far superior to most store-bought options), there's a lesser-known ingredient that will revolutionize your grilled chicken wings: aluminum-free baking powder.
Here’s how it works its magic:
- Moisture Management: Baking powder draws moisture from the surface of the skin, allowing it to evaporate more efficiently during cooking.
- pH Boost: It subtly increases the pH levels of the chicken skin. This alteration breaks down proteins, which in turn helps the skin brown more evenly and achieve an unparalleled crispiness.
Your homemade seasoning blend should include: salt, freshly cracked black pepper, garlic powder, onion powder, paprika, a pinch of cayenne for heat, and a touch of brown sugar for caramelization. Mix these dry ingredients with a small amount of aluminum-free baking powder (typically 1-2 teaspoons per pound of wings). Ensure every wing is thoroughly coated – you want a thin, even layer of seasoning. For deeper flavor and even better crisping, consider dry brining your seasoned wings in the refrigerator for at least a few hours, or up to 24 hours, uncovered. This allows the salt to penetrate and further dry out the skin.
Mastering the Grill: The Two-Zone Method for Perfect Wings
The true genius behind incredibly juicy meat and perfectly crisp skin lies in the two-zone grilling technique. This method allows you to control temperature precisely, ensuring your wings cook through gently before getting that final, glorious char.Setting Up Your Grill for Success
Whether you’re using a charcoal or gas grill, the principle is the same: create a "direct heat" zone and an "indirect heat" zone.
- Charcoal Grill: Pile hot charcoal on one side of the grill grate, leaving the other side empty. For an extra layer of smoky flavor, add a handful of smoking wood chips (like hickory or applewood) directly onto the hot coals.
- Gas Grill: Ignite burners on one side of the grill to medium-high heat, leaving the burners on the other side off.
Preheat your grill to an internal temperature of around 400°F (200°C). Use a reliable grill thermometer to monitor this, not just the lid thermometer, which can sometimes be inaccurate.
The Low & Slow Phase: Cooking to Tenderness (Indirect Heat)
This is where the magic of juicy meat begins. Place your seasoned wings on the indirect heat side of the grill, arranging them in a single layer to ensure even cooking. Close the lid and let them cook for 45 minutes to 1 hour. During this phase:
- Gentle Cooking: The indirect heat cooks the wings slowly and evenly without directly exposing them to intense flames. This prevents scorching while allowing the internal temperature to rise gradually.
- Fat Rendering: The sustained heat helps render out the fat from under the skin. This is critical for achieving crispiness later, as it reduces the amount of fat that would otherwise make the skin rubbery.
- Juice Retention: By avoiding direct, high heat initially, the meat stays incredibly tender and juicy, reaching a safe internal temperature of 165°F (74°C). Use an instant-read thermometer to check the thickest part of a drumette, avoiding the bone.
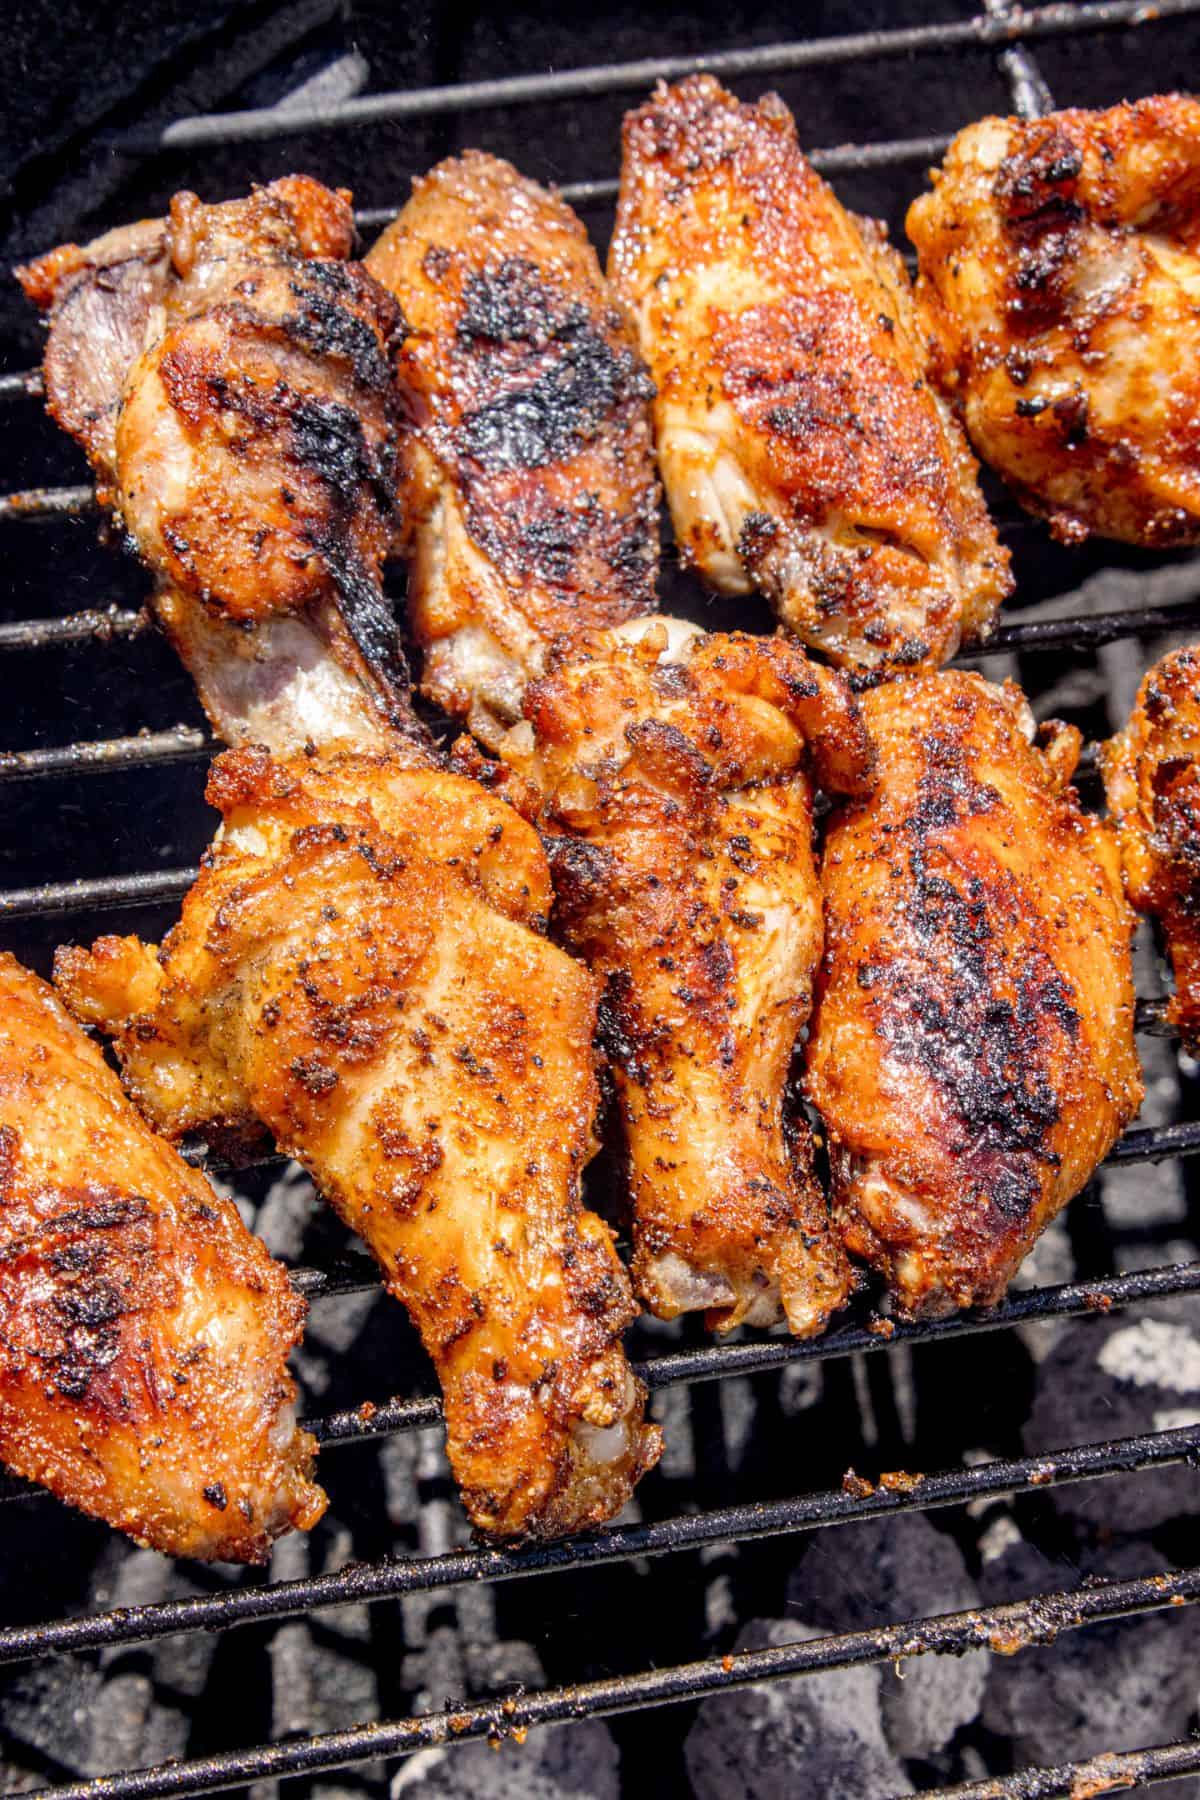
The High & Fast Phase: The Crispy Skin Finale (Direct Heat)
Once your wings have reached 165°F internally and are tender, it’s time for their grand finale. Uncover the grill, open all vents (if using charcoal) to maximize airflow and heat, and move the wings directly over the hot zone. Cook them for 2-3 minutes per side, watching them closely. This short burst of direct heat will:
- Crisp the Skin: The intense heat quickly crisps up the rendered skin, turning it golden brown and beautifully blistered.
- Develop Char: You'll achieve those coveted dark, slightly charred spots that add a depth of smoky flavor and visual appeal.
Be vigilant during this stage – wings can go from perfectly crisp to burnt very quickly. Flip them frequently to ensure even browning and prevent over-charring.
Elevating Your Grilled Chicken Wings: Sauces, Servings & Storage
While these grilled chicken wings are so flavorful they barely need sauce, dunking is undeniably half the fun. Plus, a good glaze can add another layer of complexity.Saucing and Finishing
If you desire a glazed wing, brush the crispy wings generously with your favorite barbecue sauce or hot sauce. Then, return them to the indirect side of the grill for another 5 minutes, lid closed, to allow the glaze to thicken and set. This creates a sticky, flavorful coating without burning the sauce.
Dipping Delights and Serving Ideas
The beauty of grilled chicken wings is their versatility. Consider offering a trio of dipping sauces to cater to all tastes:
- Classic BBQ: A smoky, sweet, or tangy barbecue sauce is a natural pairing.
- Spicy Buffalo: For those who love a kick, your favorite Buffalo sauce is a must-have.
- Cooling Creamy Dips: Ranch, blue cheese dressing, or even a homemade aioli provide a refreshing contrast to the richness of the wings.
- Sweet & Tangy: Honey mustard or a zesty lime cilantro dip can also be fantastic.
For more inspiration on pairing and preparation, explore resources like Master Homemade Grilled Wings: Smoky Flavor, Easy Prep & Dipping Ideas. Serve your wings immediately after they come off the grill, ideally with a side of crunchy celery and carrot sticks.
Storage and Reheating
While best enjoyed fresh, leftover grilled chicken wings can be stored in an airtight container in the refrigerator for 3-4 days. To reheat, the best method for restoring some crispiness is in an oven or air fryer at around 350°F (175°C) until heated through and crisp.
Conclusion
Achieving perfectly crispy-skinned, juicy grilled chicken wings isn't just a dream – it's an achievable reality with the right approach. By focusing on proper preparation, including the game-changing baking powder, and meticulously following the two-zone grilling method, you can consistently turn out wings that will be the star of any gathering. From the initial low-and-slow cook that renders fat and ensures tenderness, to the fiery finish that creates that irresistible crisp and char, every step plays a vital role. So, fire up your grill, gather your ingredients, and prepare to delight your taste buds and impress your guests with the ultimate grilled chicken wing experience.
